![]()
World Peace Cookies
October 16, 2008

World Peace Cookies, that is. I had been eyeing this recipe in Dorie Greenspan’s book for quite some time, and the holiday of sukkot seemed like the perfect excuse. Since the cookies were made (and eaten) on the holiday, I didn’t get any pictures so I am posting a gratuitous picture of my little one’s participation in my baking adventures.
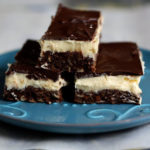
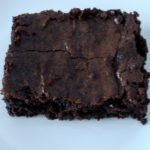
World Peace Cookies, as Dorie Greenspan calls them, are basically a rich chocolate shortbread cookie with chocolate chunks and salt. They are described as “remarkably and sensationally salty.” As a lover of salty deserts (why else would I have made frito candy?) I couldn’t wait to try these cookies.
After making the dough I almost hoped the cookies would be just okay so I wouldn’t have a good reason to struggle with them again. The dough is quite difficult to work with. It said the rolls might crack some. Mine crumbled into little bits, making it virtually impossible to cut into neat rounds. I prevailed, however, and boy was it worth it. These were some of the best chocolate cookies I have ever had. I did not find them strikingly salty. Instead the salt simply brought out the flavors of the chocolate, making the cookies seem richer and more nuanced with a pleasant slightly salty aftertaste.
I consider these a delicious chocolate cookie, but as a lover of all things salt I think I would like cookie with a more aggressive saltiness. Next time I am going to try Elizabeth Falkner’s recipe for salty chocolate shortbread, since it is probably not subtle.
That being said, these cookies are worth the trouble.
World Peace Cookies
(adapted from Baking: From My Home to Yours by Dorie Greenspan)
- 1 1/4 cups all-purpose flour
- 1/3 cup unsweetened cocoa powder
- 1/2 teaspoon baking soda
- 1 stick plus 3 tablespoons (11 tablespoons) unsalted margarine, at room temperature
- 2/3 cup (packed) light brown sugar (I used dark brown and they tasted great but it may have contributed to the texture problem)
- 1/4 cup sugar
- 1/2 teaspoon fleur de sel or 1/4 teaspoon fine sea salt
- 1 teaspoon pure vanilla extract
- 5 ounces bittersweet chocolate, chopped into chips, or a generous 3/4 cup store-bought mini chocolate chips
Preparation:
- Sift the flour, cocoa and baking soda together.
- Working with a stand mixer, preferably fitted with a paddle attachment, or with a hand mixer in a large bowl, beat the butter on medium speed until soft and creamy. Add both sugars, the salt and vanilla extract and beat for 2 minutes more. Turn off the mixer.
- Pour in the dry ingredients, drape a kitchen towel over the stand mixer to protect yourself and your kitchen from flying flour and pulse the mixer at low speed about 5 times, a second or two each time. Take a peek — if there is still a lot of flour on the surface of the dough, pulse a couple of times more; if not, remove the towel. Continuing at low speed, mix for about 30 seconds more, just until the flour disappears into the dough — for the best texture, work the dough as little as possible once the flour is added, and don’t be concerned if the dough looks a little crumbly. Toss in the chocolate pieces and mix only to incorporate.
- Turn the dough out onto a work surface, gather it together and divide it in half. Working with one half at a time, shape the dough into logs that are 1 1/2 inches in diameter.
- Wrap the logs in plastic wrap and refrigerate them for at least 3 hours. (The dough can be refrigerated for up to 3 days or frozen for up to 2 months. If you’ve frozen the dough, you needn’t defrost it before baking — just slice the logs into cookies and bake the cookies 1 minute longer.)
Getting Ready to Bake:
- Center a rack in the oven and preheat the oven to 325 degrees F. Line two baking sheets with parchment or silicone mats.
- Using a sharp thin knife, slice the logs into rounds that are 1/2 inch thick. (The rounds are likely to crack as you’re cutting them — don’t be concerned, just squeeze the bits back onto each cookie.)
- Arrange the rounds on the baking sheets, leaving about 1 inch between them.
- Bake the cookies one sheet at a time for 12 minutes — they won’t look done, nor will they be firm, but that’s just the way they should be.
- Transfer the baking sheet to a cooling rack and let the cookies rest until they are only just warm, at which point you can serve them or let them reach room temperature.
Note: These cookies are much better the day they are baked, they lose some of the depth of flavor when stored for more than a day.
Recipe Updates – Delivered Fresh!
Related Recipes


Thank You For Printing This Recipe! Visit Us Again Soon!
Recipe Page: https://www.couldntbeparve.com/recipe/all-we-want-is-world-peace/
Your boys are adorable!